In todays world, the desire to get back to basics is becoming more and more desirable. Our hope is that you will find some of the knowledge we share a benefit to you, to get closer to your dream of a healthier lifestyle, less dependent on assembly lined, processed, manufactured items.

Our goal is to help you find ways to use modern conveniences to allow you to live the life you want to live, and raise your family with the traditions that are important to you.

Grab a cup of coffee, or a glass of tea, and join us as we share our lives, our family and our knowledge with you.


Tuesday, April 28, 2015

Oh, Lardy!!!

After butchering in March, we used a beautiful April afternoon and set things up to render the fat into cracklin's and lard.  A friend had her fat stored in the freezer, so we got together invited a few friends and had a good old-fashioned Lard Renderin'!  I use lard in my cooking on a regular basis. I use it as the starter fat for pepper gravy, use it in all my pie crusts, and for frying pretty much any meat.  I use much like shortening in any cooked dish.  It is additive free, wholesome, and FREE, as the fast is the "left-overs" from butchering hogs.  One of these days, when I get a bit of time, I will experiment with making soap from the lard, as well.  I've been told that lard or coconut oil make the richest lathers and best moisturizing soaps. But, that is for another day.  Let's move on to the rendering process.

After thawing, the large pieces of fat were cut into small pieces and ran through the meat grinder. This is not an absolutely necessary step, but it saves many hours of cook time in the rendering process.  We had ground ours before freezing, but our friend had not, so we whipped out the grinder and got it ground down in just a few minutes.

We have a large cast iron kettle that sets up on a steel frame with four legs. To get some extra height, and be able to make a larger fire, we put the legs up on concrete blocks, allow more wood underneath. After warming the kettle, and wiping it out, we added a cup of water. This prevents the first fat from sticking and scorching as the higher temperature is reached.  The fat was added in two different bunches, which gave it time to melt some down before it was all added, again, preventing scorching.

The length of time the process of cooking out the water, and melting down the fat varies. As the fat heats up, you see the water rising to the top and "boiling off" in the form of bubbles that almost looks like foam.  On this batch, we lit the fire at noon, and finished up.....had cracklin' cornbread and apple pie with lard crust.....and were pretty much cleaned up by 5. The wind kicked up so we had to improvise a wind break with a couple of our tables.  This worked pretty well and is something I will try to remember for the next time we need a wind break on a fire.

We spent the afternoon visiting, watching the kids play and planning future projects. Here are a few pictures of the time spent waiting for the water to boil off.


Papa appears to have Justin and Melody's complete attention for one of his many stories of the day.
Papa used some of the wait time to clean some beehive frames. Cheryl will be boiling the beeswax to clean it and use in her homemade lotions.
I'm not sure Rhonda and Kristin had any idea what they were getting into when the came to Miller to join us for the first time.
 Justin, JD and Bruce are hatching a plan for mischief, I'm certain of that

 Owen and Aden enjoyed an afternoon on the Farm.
Rastus and Maddie enjoyed each others company. 
 Aden and Owen are nearly the same size.  This Nana thinks there should be a teeter-totter built this summer.
 Jayde, Gabby and Erin had a lot of running and playing fun, too.
 I'm not sure how Casey got all the kids still and in one place at the same time, but this is a great picture of them. 
 Bruce and Justin had time to discover what treasures Bruce had recently purchased from a sale on the internet. 
Kristin, Jenny, Melody, Rhonda and Justin anxiously awaiting the removal of cracklin's. 


As the water is boiled out, the cracklin's cook, darken and settle to the bottom.  The cracklin's are dipped from the bottom by a metal strainer.  We have decided we are going to watch for a large metal mesh strainer and put it on a long handle.  This should save some back ache and burns!


The cracklin's are spread on baking sheets to cool and drain before packaging.


We have two aluminum pitchers which work well for pouring up the lard into the containers.  It must be strained to remove any cracklin's and other residue before the final cooling.  We use white flour sack tea towels to strain. The towel was placed into a metal strainer which just fits on the tin container.  Always be sure to all metal at this point, as the temperature is hot and will melt anything that is plastic.


I use popcorn tins to hold our finished lard for the final cooling.  Cheryl bought unused paint cans for hers.  Great idea, as I will have to repackage mine into something more freezer friendly, while Cheryl's is ready for the freezer as soon as it cools.  There are mixed feelings about storing lard in the freezer/refrigerator or out at room temperature.  Perhaps our ancestors used the lard more quickly than I do, but I learned that if left at room temperature, the lard will mold and be wasted.  I keep mine in the freezer for long term storage, then place in the refrigerator as needed for use.


The final product looks dark in the tin container, but as it cools, it becomes much lighter in color, almost white.

I prefer to package our cracklin's in resealable plastic freezer bags. This way we can remove what we want to use and re-seal the others for later use.
After the hard work of the afternoon, we enjoyed some cracklin' cornbread with hot dogs over the fire, and apple pie with good old-fashioned lard crust.  I love using my iron skillet for cornbread; it comes out perfect every time.  One of these days I hope to find a cast iron pie plate. I'm not sure there even is such a thing.  That makes me wonder.....could I make a deep dish pie in my cast iron skillet?  Something new to try.  I will let you know how it goes.

So, lard for another year has been rendered.  Once again, we adapted a basic pioneer necessity to become an easier process by using some of our modern utensils and storage, my definition of Modern Pioneers.

Monday, April 20, 2015

Bacon, Bacon, Bacon.........

After hog butchering this year, we cured and smoked our own bacon.  We chose not to do hams for several reasons.  We love roasts, and pulled pork both of which come from the same area of meat as the hams.  An additional reason is the requirements of the curing process. The meat must have the cure on them for approximately 1 day for every inch of thickness AND it must be less than 45 degrees for the day to count.  We waited until spring to butcher and the weather  was too warm to allow curing to be done in barrels in the open air.  We do not have a root cellar that stays cool.  Being Modern Pioneers we are fine with using modern conveniences but did not enough refrigerator space to allow for the hams and bacon.....so we decided to do bacon only.  I will say that is turned out delicious!  I will walk through our process, even the failures so you can see what we did.


The process started the day we butchered with working the Morton Sugar cure into the meat. The cure was purchased at our local grocery store but can also be purchased online.  It was rubbed in and packed into the tubs you see here.  These were placed, uncovered in the refrigerator.  The rule of thumb is to allow them to cure for 1 day per inch of thickness.  Due to our schedules, ours actually cured 4 days, even though the thickest part was only a couple of inches thick.
It was then time to rinse and soak away the salt from the cure.  The meat was rinsed with lots of water until it seemed that the salt/sugar mixture was all gone, then allowed to soak, submerged in fresh water. This water was changed and the meat rinsed, daily for an additional 4 days.  Not a lot of work to this part, but time consuming.  Each day we would slice off a small amount of meat and cook it to see if we had enough of the salt removed.  When the salt had been soaked from the meat to our taste, it was time to add the smoke flavor.


Our smoke house was built about a year ago, in anticipation of curing/smoking our own pork, and other meats.  There is another set of doors on the opposite side of these so you can reach in from either side to be able to easily hang the meat.


At Academy, one of the local sporting goods stores, we found these large size 8 fish hooks.  Papa took them to the grinder and removed the barb so that they would slip out of the sides of meat without hanging up.


1 1/4" dowel rods span the ceiling of the smokehouse and can be easily lift up and removed.  With nylon string tied to each hook, they could be easily slid over the dowels and ready to hang whatever was going to be smoked.


The hooks worked well, the slid in easily to hold the meat in mid air for the smoke to circulate around and penetrate all surfaces, but were easily removed when the smoking was completed.


We tried some apple wood pellets, but they didn't work well.  They didn't create much smoke and when we added some soaked hickory slices it went completely out.  The only thing it was good for was entertaining Rastus who thought he was real fire-fighter.


We ended up using charcoal, adding some small green hickory sticks.....and with a little patience.  We got some smoke going.


We added a block in the center of the floor of the smokehouse on the piece of tin, then added some soaked hickory chips to create more smoke.


When the smoke got rolling, we secured the doors and left for 6 hours.


We had to cut the slabs to fit in our slicer so our slices are a little shorter than store-bought.


We weighed out 1 pound, and vacuum sealed it before freezing it.  By the way, did you know that when you buy a "pound" of bacon at the store, it only weighs 12 ounces these days?

The flavor of this bacon is wonderful.  I have had multiple tell me that it is the best bacon they have ever eaten...including some pretty picky friends and family.  I call this one a complete success....the old flavor, done with the help of our modern conveniences.  What a wonderful life!

Thursday, April 9, 2015

March Gathering 2015


I just realized that I never finished this post about our March 2015 Gathering.  Sorry about that!  On March 8th several joined us for an informal Gathering at the Matthews Farm near Miller, Missouri.  We used the afternoon to visit, mingle and share ideas.  The children played together....in the woods...in puddles...the adults got to know one another and shared homesteading stories.  Everyone had a great time.  As the afternoon wore on, we used the tractor for an old fashioned hayride to take people and food to The Gathering Place.  We had tons of great food and more visiting time.   As darkness closed in, the bonfire warmed us and added to the atmosphere.

We had guests from Stotts City, Neosho, Cape Fair, Ash Grove, Everton, Bois D'Arc and Brighton.  Janet Taylor popped in from Collins, but couldn't stay for the meal.  Hopefully, she will be able to bring the family and spend more time next time.   We hope to make the time for monthly events.  Classes, Demonstrations, Gatherings, etc.  If you have any ideas you would like to see, please share with us and we will try to accommodate the ideas.

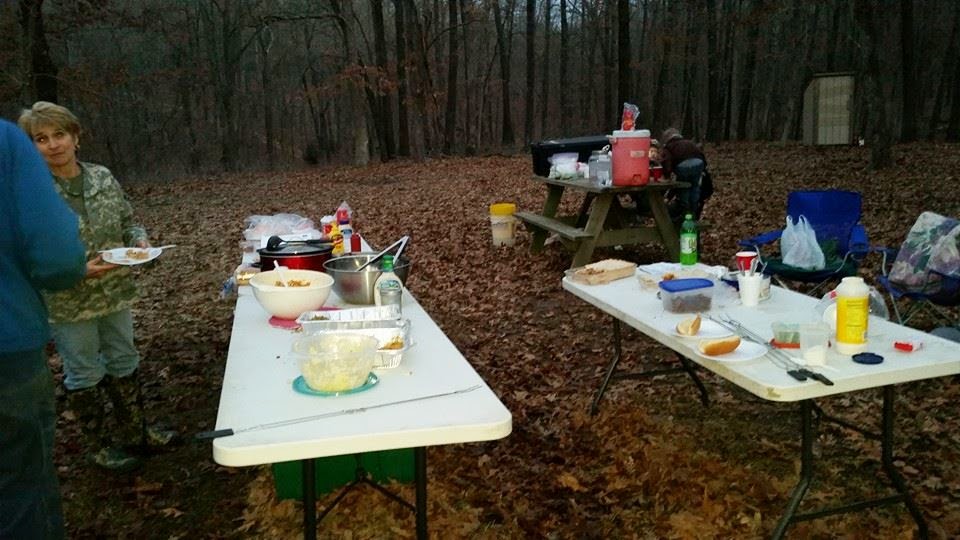
It looks like April will bring a day of Lard Rendering.  You can come watch and learn, participate in the process. Bring a picnic lunch, or bring hot dogs to roast over the fire after the rendering is complete.  We look forward to learning and growing together as we all learn ways to live a Modern Pioneer lifestyle here in southwest Missouri.


Just a few shots of the visiting and playing that went on during the afternoon and into the evening.


Some of the guests had to be torn away from visiting to eat.


Blankets and Jumper Seats made even the youngest guests comfortable.


Larry and Sharon finally got the food line started.


The coffee stayed warm and so did Dennis as he stayed close to the bigger fire for awhile.


Everyone contributed to a great meal. 4 tables of food were spread before the group.
And the visiting continued among Kyle, JD, Justin, Melody, Willow, Lance, Cindy, Becky and Tom as Dennis kept watch on the bonfire.


The trees stretched out and gave the kids plenty of room to run and play


Our transportation for the evening.


No Gathering is complete without fresh coffee


Casey, Willow, Dennis, Owen and Maddie enjoyed hitching a ride back to the house and their cars as the evening drew to a close.


Lance, Lilly and Savana watched over Erin, Bella and Hunter on the ride back.


Becky carries our youngest guest, Gracie to wagon for the ride back to the house.


Kathy, Tom, Melody and Justin just kept on visiting.
We were honored to have each of you join us in March for the first Gathering at the Matthews Farm and hope there will be many more to come and new guests each time.  Join us at SW Missouri Homesteaders on Facebook for future gatherings, classes, demos and events.

Thursday, April 2, 2015

Nana's Homemade Peanut Butter


At our house we go through A LOT of peanut butter.  We eat peanut butter sandwiches, peanut butter and crackers, on toast, on pancakes.....we like several candies made with peanut butter. Papa and I even put peanut butter on our ice cream.  We've noticed lately that we both get some pretty serious heartburn especially after eating peanut butter, so I decided to try making our own and see how we like it, and if the heartburn issue will resolve.  I was amazed at how easy making your own actually is.  It can be made in a food processor or a heavy-duty blender.  I don't own a food processor, but may have to invest in one soon. The uses for one are varied to the point I think it would be a wise investment.  Remember, the premise behind being a Modern Pioneer is not to do without and create an added work load, but to provide better simpler things for youself and your family, using the modern conveniences available to us.  If we ever go off grid, that will change, but for now, we use our resources to our advantage.


I have a Vitamix. It is an old one, not like any that they sell these days, but it works great so that is what I decided to use for my first batch of peanut butter.  As you can see, the pusher is narrow and wooden and the container is metal, rather than transparent like the ones sold today.


I gathered my supplies.  The list of ingredients couldn't be more simple....Peanuts. That's it; Peanuts.  I bought some bulk at a local health food store before Christmas for candy making and ended up not using them. They have been vacuumed sealed in a half gallon mason jar since then.  I measured out 1 pound for my first batch.


The peanuts filled the container about 1/3 full. After about 45 seconds of blending, I took the top off to check progress.  The peanuts were beginning to look crushed, although I did have some trouble getting my pusher to work them down well. I think the wider one made today would make that job go much faster. Or the addition of a food processor to my kitchen which would make pushing down the peanuts unneccessary.  (Yes, I am trying to talk myself into buying a food processor or more importantly building my case to convince Papa the we NEED a food processor! ;) )

After more grinding, stirring, grinding and stirring, we got a pretty nice consistency for peanut butter.  It is not as creamy as store bought, but the flavor is great. Once we get used to the consistency I think this will be a kitchen staple.


Because of no additives, this does need to be kept in the refrigerator.  As I poured it up in the jar, I noticed that there was some not so creamy parts in the corners of the container.  This will be solved with added stirring or the purchase of a food processor which will have a round container and no corners for the little bits to catch and hide.  Papa and I have both tasted this and no heartburn! I think we have a winner! One more thing we can do for ourselves, with help of our modern conveniences.  This is what being a Modern Pioneer means to me. :)